Post by beaty1961 on Jun 7, 2018 19:53:57 GMT
I've been exploring the idea of making my own figures for FLW/PW, in particular I have been dabbling in making 'peg soldiers'. The idea came about from a project I did making Christmas Tree decorations, one of the decorations was a tradition toy soldier.
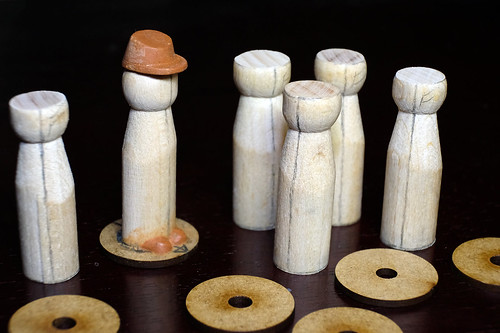
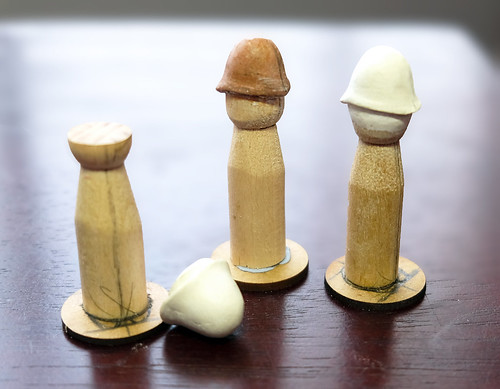
The peg I use is the traditional 'dolly peg', the great thing about these are they are cheap as chips - £1.75 for a pack of 24 beechwood pegs - and the idea is to trim the pegs down to make a simplified body shape for a stylised soldier. My first attempts also explored different sizes, her's a pic of a couple of the sizes I tried out (I did others, taller - but they didn't look right for gaming purposes)...
As you can see, these models are *very* simple - perhaps the most complicated thing was the ACW 'kepi' hat (which was made out of a couple of pieces of peg, and then duplicated by casting a mould). But here's a couple of pics that will give you an idea of how they are put together...
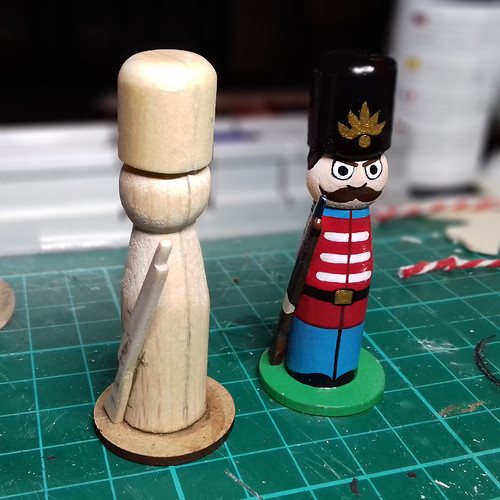
To start with, you need.........Er, some pegs!

Now, I cut these pegs just above the 'legs' of the peg, this give you a 48mm 'blank' to work with. You could cut the pegs to 54mm and fill in the little gap between the 'legs' if you were a stickler about things being 54mm - but my opinion is that these 'bodies' are well out of scale size, why bother?
Anyway, here's a peg cut down, base added and also a hat (another section of peg) and a rifle (which was cut out of a wooden lolly stick!
NEXT...I wanted to see if you could do something a little more 'historical', so I started on a Franco-Prussian War project. First stop, some French peg soldiers. I cut down the pegs as normal, and trimmed off the top of the 'head' so that it would accept the kepi that I made (this is why I made an mould earlier)...
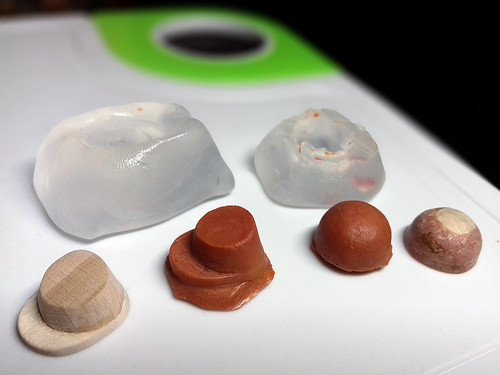
Above: Here's some of the hats I cast, the round ones will be the basis for
some Prussian Picklehaube helmets.
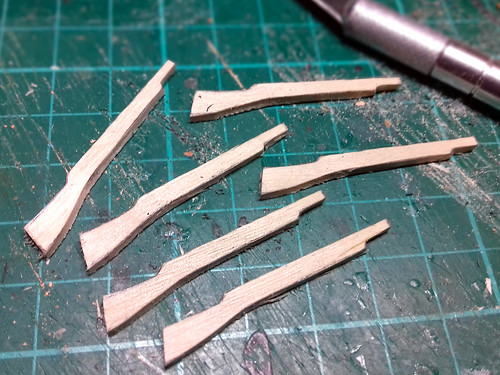
The next little job was to make some 'rifles'. I'm not going for complete accuracy here, just a rough rifle shape. The simple shape makes it easy to craft these out of wooden lolly sticks (which are available in packs from any good craft shop)...
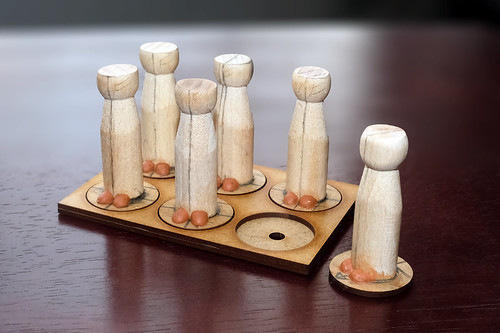
Now, for the Portable Wargame rules I am making infantry units of six figures, so I thought it might be wish to put the 'regimes' in a unit tray. The particular trays I bought come ready to accept magnets...
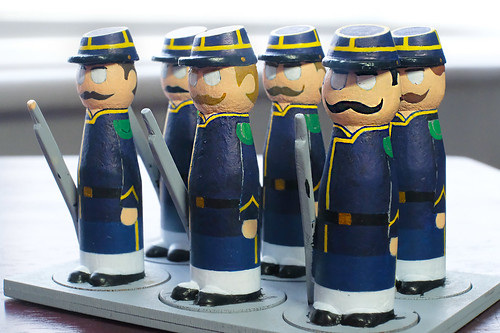
The end result of my woodwork. Very simple - aside from the kepis - and quick to put together (and cheap)! But now the more difficult part - painting. Because these are stylised figures with minimal features I decided that it would be in keeping to simplify the uniform design, so I started by drawing out my ideas for painting the figures and came up with this...
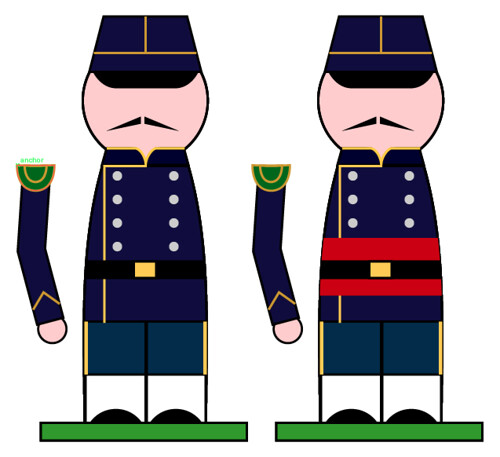
Above: Stylised 1870 French 'Chasseurs à pied' (light infantry). These
soldiers were the French equivalent of German Jagers.
I usual paint from 'behind to front', laying down the rearmost colour with 'clothing' colours over the top. SO...Flesh colours always first, then features, then hat and jacket, etc, etc...
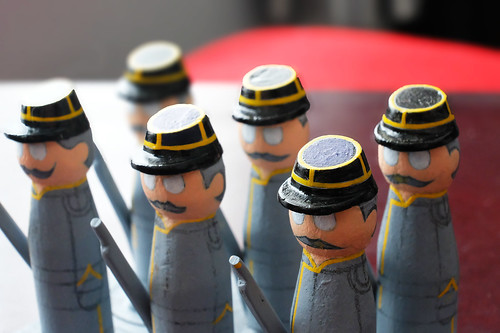
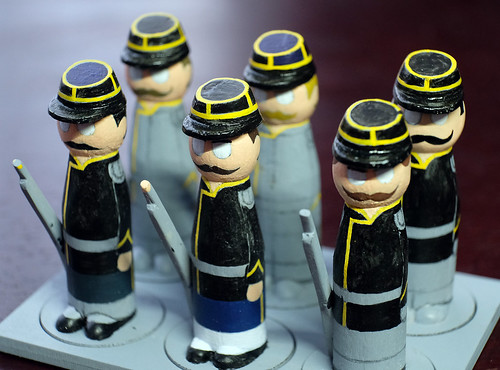
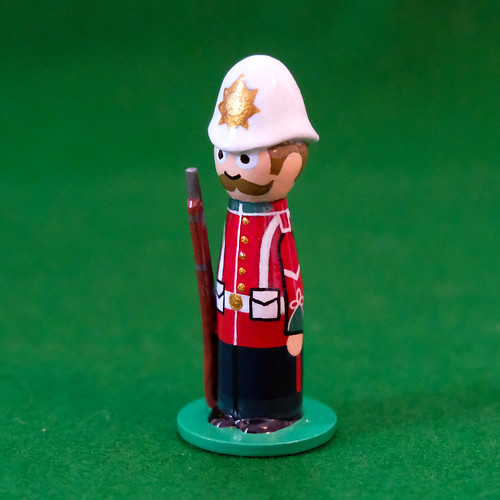
And this is as far as I am with these guys, just some small detailing to do and then it will be a coat of gloss varnish for that traditional toy soldier look...
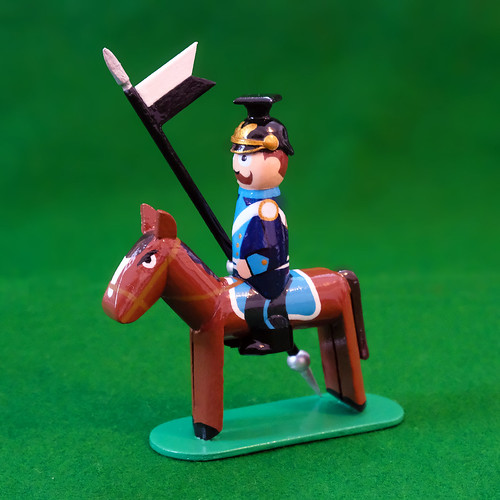
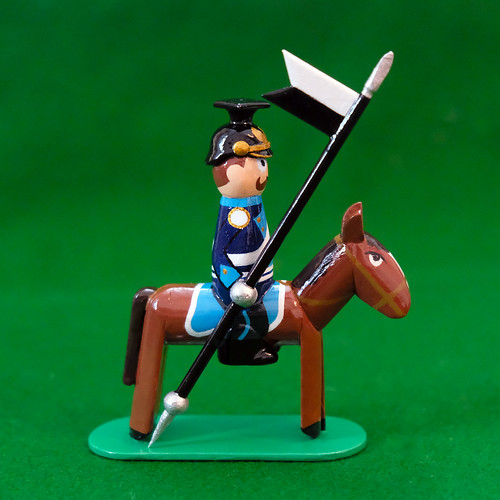
In the meantime, however, I have begun to experiment with more styles and different hats. Hats are the trickiest part (relatively speaking) as - historically - the soldiers headgear was always the most unique and identifiable part of the uniform, so a little more work has to go into these I'm afraid. Currently I am trying out British Service helmets and German Ulan helmets...
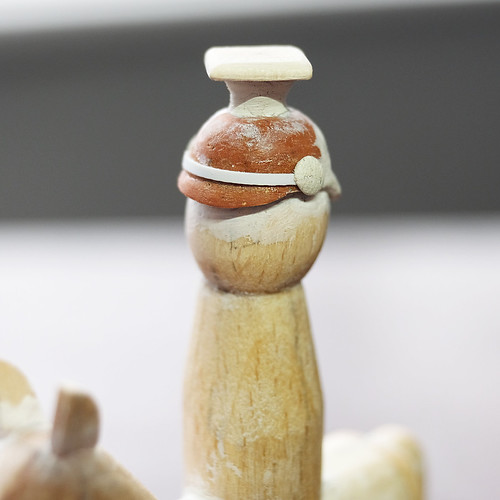
These helmet models were basically sculpted from Lilliput putty, cast for duplication and then the final ornamentation added using bits of wood (peg cut-offs) or plasticard.
Well, thats the process - I hope you find it interesting.
Beaty
The peg I use is the traditional 'dolly peg', the great thing about these are they are cheap as chips - £1.75 for a pack of 24 beechwood pegs - and the idea is to trim the pegs down to make a simplified body shape for a stylised soldier. My first attempts also explored different sizes, her's a pic of a couple of the sizes I tried out (I did others, taller - but they didn't look right for gaming purposes)...
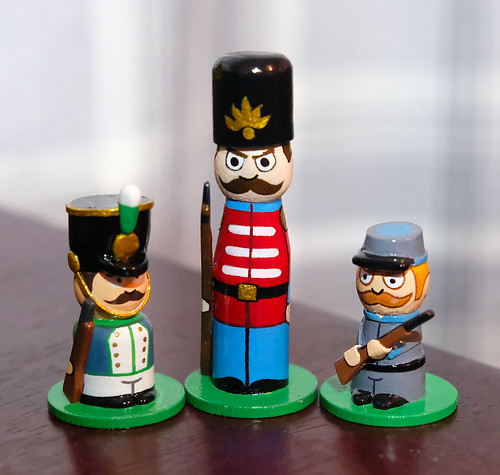
Above: Left to right - 'mini-mini' Napoleonic (24mm), traditional toy
soldier (48mm) and 'mini-mini' ACW Confederate.
soldier (48mm) and 'mini-mini' ACW Confederate.
As you can see, these models are *very* simple - perhaps the most complicated thing was the ACW 'kepi' hat (which was made out of a couple of pieces of peg, and then duplicated by casting a mould). But here's a couple of pics that will give you an idea of how they are put together...
To start with, you need.........Er, some pegs!

Now, I cut these pegs just above the 'legs' of the peg, this give you a 48mm 'blank' to work with. You could cut the pegs to 54mm and fill in the little gap between the 'legs' if you were a stickler about things being 54mm - but my opinion is that these 'bodies' are well out of scale size, why bother?
Anyway, here's a peg cut down, base added and also a hat (another section of peg) and a rifle (which was cut out of a wooden lolly stick!
NEXT...I wanted to see if you could do something a little more 'historical', so I started on a Franco-Prussian War project. First stop, some French peg soldiers. I cut down the pegs as normal, and trimmed off the top of the 'head' so that it would accept the kepi that I made (this is why I made an mould earlier)...
Above: Here's some of the hats I cast, the round ones will be the basis for
some Prussian Picklehaube helmets.
The next little job was to make some 'rifles'. I'm not going for complete accuracy here, just a rough rifle shape. The simple shape makes it easy to craft these out of wooden lolly sticks (which are available in packs from any good craft shop)...
Now, for the Portable Wargame rules I am making infantry units of six figures, so I thought it might be wish to put the 'regimes' in a unit tray. The particular trays I bought come ready to accept magnets...
The end result of my woodwork. Very simple - aside from the kepis - and quick to put together (and cheap)! But now the more difficult part - painting. Because these are stylised figures with minimal features I decided that it would be in keeping to simplify the uniform design, so I started by drawing out my ideas for painting the figures and came up with this...
Above: Stylised 1870 French 'Chasseurs à pied' (light infantry). These
soldiers were the French equivalent of German Jagers.
I usual paint from 'behind to front', laying down the rearmost colour with 'clothing' colours over the top. SO...Flesh colours always first, then features, then hat and jacket, etc, etc...
And this is as far as I am with these guys, just some small detailing to do and then it will be a coat of gloss varnish for that traditional toy soldier look...
In the meantime, however, I have begun to experiment with more styles and different hats. Hats are the trickiest part (relatively speaking) as - historically - the soldiers headgear was always the most unique and identifiable part of the uniform, so a little more work has to go into these I'm afraid. Currently I am trying out British Service helmets and German Ulan helmets...
These helmet models were basically sculpted from Lilliput putty, cast for duplication and then the final ornamentation added using bits of wood (peg cut-offs) or plasticard.
Well, thats the process - I hope you find it interesting.
Beaty