

Post by beaty1961 on Jun 9, 2018 8:31:33 GMT
Hi all! It was mentioned that some might be interested in how I mould and cast some of the basic pieces I am making for my peg soldier projects. So here's a little post on VERY basic casting!
First of all, when I say basic I mean basic...This type of casting is 'entry level' casting and is very accessible and 'doable' for beginners - hence me doing it!
My situation was that I wanted to duplicate simple shapes quickly and easily, I didn't want large numbers of copies and I didn't want something that was messy and convoluted (or smelly). So when I came across a Japanese product called Oyumaru Instant Mold (yes, that is how the Japanese have chosen to open mould) I decided that was the ideal product for me to try.
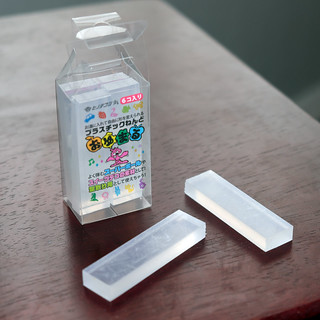
This product comes in 'plastic-like' sticks, it can be clear of coloured and is intended (note) for moulding smaller objects by 'press moulding' - which is literally pressing the object into the medium and taking a cast of that impression - BUT, with a bit of patience you can do a more 3D cast using the two-part mould technique.
Instant Mold is activated by dropping a stick into boiling water, it then become soft and malleable...
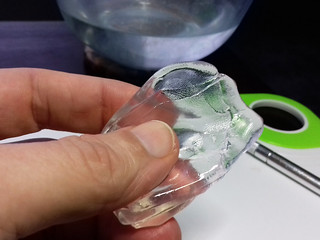
I just boiled the kettle, poured the boiling water into a pyrex bowl and then submerged the Instant Mold stick for 3 minutes. After this I removed the stick with some tongs and found it soft and squishy!
NOW - YOU HAVE TO WORK REASONABLE FAST! - You press the object you want copy into the soft Instant Mold block, pressing the Instant Mold snugly into the object to create the mould. THE INSTANT MOLD WILL COOL AND HARDEN FAIRLY QUICKLY.
I began with very basic shapes - a couple of hats that I had made for my peg soldiers - nothing too complex or with lots of detail. I had already cut the rectangular Instant Mold stick into two giving me two roughly square blocks to work with...
I pressed my hat objects into the soft blocks until the soft Instant Mold came slightly over the top of the object. And once it had hardened I trimmed off the excess - leaving a nice flat top to my mould inline with the top of my master object...
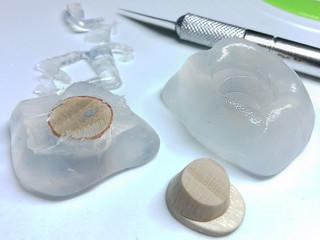
You don't have to do this, but if you don't you just have to be careful in the next stage not to use an excessive amount of casting material.
I chose to use Milliput two-part resin putty as my casting material as it starts out with the consistency of plasticine but then hardens to hard resin that can be sanded and carved...
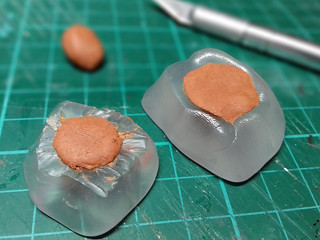
Just press the mixed Lilliput putty into the mould, ensuring it goes into any nooks and crannies. The clear Instant Mold helps you check that you have no air bubbles of have not got your putty into all the areas of your mould. As you can see I tried not to have too much excess over the top that I would later have to trim off.
The one downside of using Milliput is that you have to leave it overnight to set, but you can use other casting materials (like Green Stuff) which set much quicker.
Once dried, however, no matter what you use the hardened cast just pops out the mould (no releasing agent required), Instat Mold is not sticky and even if your casting putty is sticky it just doesn't seem to where to Instant Mold. Great!
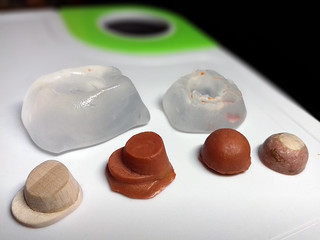
As you can see the casts are nice copies of the originals, though I chose to start with very simple shapes you can go for something with a bit more detail than this. (Look up Instant Mold on YouTube and you will find videos of tutorials that show more complicated casts.)
I was happy to start simple, as I knew I wanted to decorate the basic shapes - like the round hat - with additional ornamentation to make different looking helmets AND THEN to re-cast these finished helmets once again using this technique. In this way I would have simple MASTER shapes from which I could make and then cast other more complicated items.
NOW...Onto one of the best features of Instant Mold. If you are unhappy with your original mould - say there is a defect in the mould you make - or perhaps you are finished with your mould (maybe it was just a one-off), you can reheat your mould and turn it back into a block ready to use it again for something else!
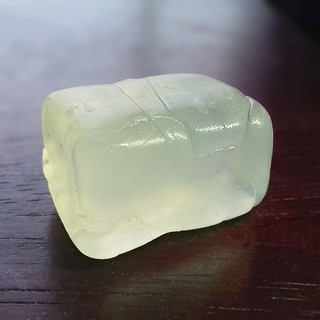
This makes Instant Mold great value and you can re-use it again and again.
PROS AND CONS
As you will probably have guessed, Instant Mold is intended for 'short run' duplications and is neither meant for really complicated casting. If you want to knock out a large number of complex 3D castings then you should maybe move onto the next stage of moulding which is full-blown resin casting using the 'pour mould' technique.
But 'pour moulding' is more expensive, lengthy, complex, messy and smelly. So if you just want a 'quick copy' of something simple, then Instant Mold should be in your tool kit.
I hope you find this post useful, Beaty

First of all, when I say basic I mean basic...This type of casting is 'entry level' casting and is very accessible and 'doable' for beginners - hence me doing it!

My situation was that I wanted to duplicate simple shapes quickly and easily, I didn't want large numbers of copies and I didn't want something that was messy and convoluted (or smelly). So when I came across a Japanese product called Oyumaru Instant Mold (yes, that is how the Japanese have chosen to open mould) I decided that was the ideal product for me to try.
This product comes in 'plastic-like' sticks, it can be clear of coloured and is intended (note) for moulding smaller objects by 'press moulding' - which is literally pressing the object into the medium and taking a cast of that impression - BUT, with a bit of patience you can do a more 3D cast using the two-part mould technique.
Instant Mold is activated by dropping a stick into boiling water, it then become soft and malleable...
NOW - YOU HAVE TO WORK REASONABLE FAST! - You press the object you want copy into the soft Instant Mold block, pressing the Instant Mold snugly into the object to create the mould. THE INSTANT MOLD WILL COOL AND HARDEN FAIRLY QUICKLY.
I began with very basic shapes - a couple of hats that I had made for my peg soldiers - nothing too complex or with lots of detail. I had already cut the rectangular Instant Mold stick into two giving me two roughly square blocks to work with...
I pressed my hat objects into the soft blocks until the soft Instant Mold came slightly over the top of the object. And once it had hardened I trimmed off the excess - leaving a nice flat top to my mould inline with the top of my master object...
You don't have to do this, but if you don't you just have to be careful in the next stage not to use an excessive amount of casting material.
I chose to use Milliput two-part resin putty as my casting material as it starts out with the consistency of plasticine but then hardens to hard resin that can be sanded and carved...
Just press the mixed Lilliput putty into the mould, ensuring it goes into any nooks and crannies. The clear Instant Mold helps you check that you have no air bubbles of have not got your putty into all the areas of your mould. As you can see I tried not to have too much excess over the top that I would later have to trim off.
The one downside of using Milliput is that you have to leave it overnight to set, but you can use other casting materials (like Green Stuff) which set much quicker.
Once dried, however, no matter what you use the hardened cast just pops out the mould (no releasing agent required), Instat Mold is not sticky and even if your casting putty is sticky it just doesn't seem to where to Instant Mold. Great!

As you can see the casts are nice copies of the originals, though I chose to start with very simple shapes you can go for something with a bit more detail than this. (Look up Instant Mold on YouTube and you will find videos of tutorials that show more complicated casts.)
I was happy to start simple, as I knew I wanted to decorate the basic shapes - like the round hat - with additional ornamentation to make different looking helmets AND THEN to re-cast these finished helmets once again using this technique. In this way I would have simple MASTER shapes from which I could make and then cast other more complicated items.
NOW...Onto one of the best features of Instant Mold. If you are unhappy with your original mould - say there is a defect in the mould you make - or perhaps you are finished with your mould (maybe it was just a one-off), you can reheat your mould and turn it back into a block ready to use it again for something else!
This makes Instant Mold great value and you can re-use it again and again.
PROS AND CONS
As you will probably have guessed, Instant Mold is intended for 'short run' duplications and is neither meant for really complicated casting. If you want to knock out a large number of complex 3D castings then you should maybe move onto the next stage of moulding which is full-blown resin casting using the 'pour mould' technique.
But 'pour moulding' is more expensive, lengthy, complex, messy and smelly. So if you just want a 'quick copy' of something simple, then Instant Mold should be in your tool kit.
I hope you find this post useful, Beaty